- Published on
Getting Started with Azure Cosmos DB with Entity Framework in ASP.NET Application
Table of Contents
Azure Cosmos DB is a globally distributed and fully managed database service provided by Microsoft. It offers guaranteed single-digit millisecond latencies, instant scalability and multi-region data distribution. Azure Cosmos DB is a multi-model database service meaning you can create and store data using document, key-value, wide-column or graph APIs.
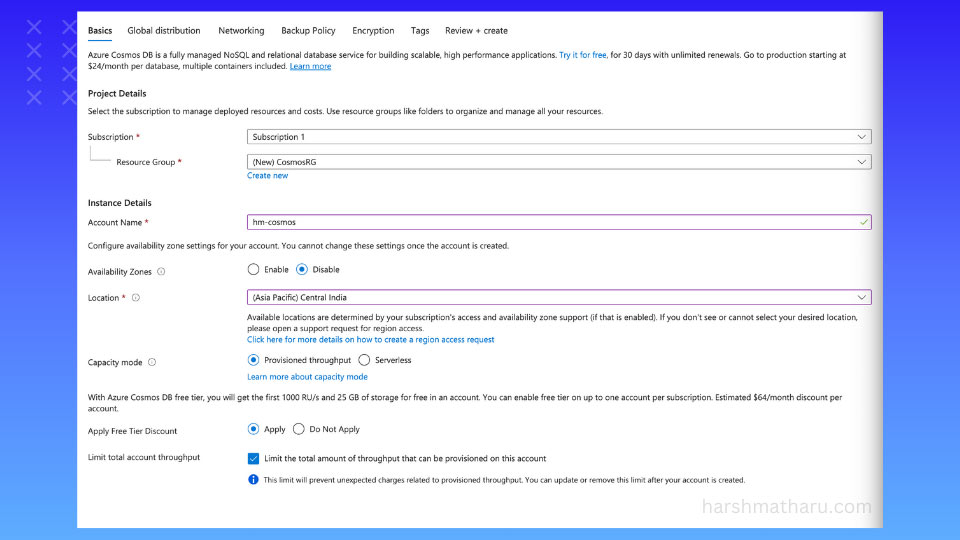
Creating a Cosmos DB Account
- Open Azure Portal, search and create Azure Cosmos DB resource.
- Select the API you want to use. For this tutorial, we will use NoSQL API.
- Fill in the required details.
- Enable Availability Zones if you want to have strong resiliency. However, if you are going to use multi-region model then it will not add much value.
- While selecting Capacity mode, choose Serverless only if you have unpredictable traffic pattern. Also, Serverless account does not support global distribution so your account will run only in a single region.
- Leave rest of the settings as default and click on Review + Create.
Understanding Request Unit (RU)
Before creating the database we need to understand, what are Request Units (RU).
When we execute any query in Cosmos DB, it consumes some amount of Request Units (RU). RU is a measure of the amount of resources (CPU, IOPS and memory) consumed by the query. For example, fetching a 1KB item by its id consumes 1 RU.
Create Database
- Once the account is created, navigate to the account and click on Data Explorer.
- Click the New Container dropdown and select New Database.
- Add database name.
- Under Database Throughput, select Manual in case you are just testing things out.
- Click OK.
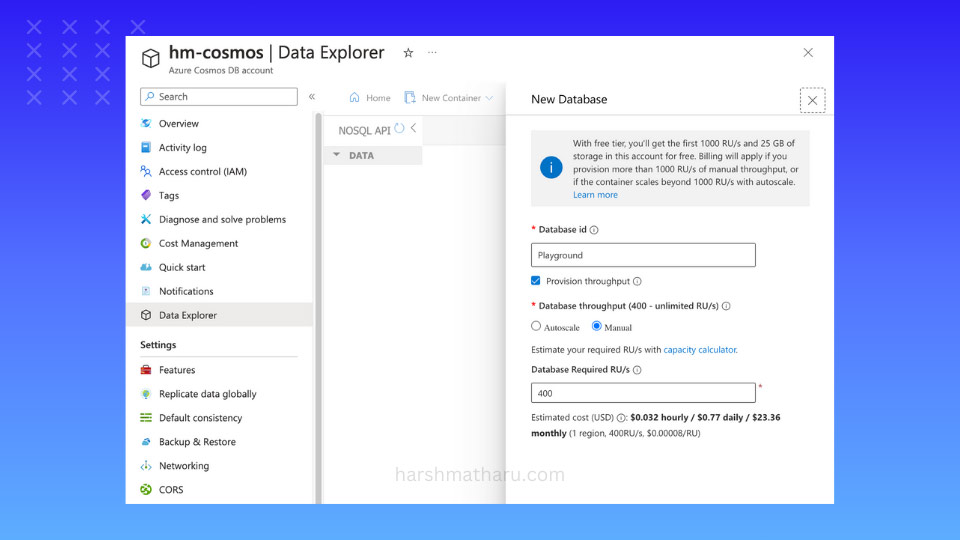
In Cosmos world, throughput is a measure of how many RUs your application can consume per second. Here we have specified 400 RU/s to begin with but to accurately estimate the throughput required, first, we need to see how many RUs our queries are consuming and what is query per second count of our application. For example, if our application is making 10 queries per second and each query is consuming 10 RUs then we need 100 RU/s.
Create ASP.NET Application
Create a new ASP.NET web application. Remove everything from Program.cs and add the following code.
var builder = WebApplication.CreateBuilder(args);

var app = builder.Build();

app.Run();
Now, let's create a models which we will use to perform CRUD operations.
public class User
{
    // Required by EF
    public User() { }

    public User(Guid id, string name, string[] likes, Address address)
    {
        Id = id;
        Name = name;
        Likes = likes;
        Address = address;
    }

    public Guid Id { get; init; }

    public string Name { get; init; }

    public string[] Likes { get; set; }

    public Address Address { get; set; }
}
As you might have noticed, we have two constructors in the User class. This is because EF will not be able to use the parameterized constructor because it has a parameter of complex type (Address). That is why I've added a parameterless constructor.
public class Address
{
    public Address(string state, string country)
    {
        State = state;
        Country = country;
    }

    public string State { get; init; }

    public string Country { get; init; }
}
Before we move onto setting up Entity Framework, I'd like to highlight some points on Cosmos DB containers.
- Cosmos DB stores data in containers. You can think of containers as tables in SQL databases.
- Unlike tables, containers do not enforce schema. You can store different types of entities in the same container. To differentiate between entities, you can use a property called
discriminator. - Each entity should have a partition key. Cosmos DB uses partition key to distribute data across multiple partitions. We should carefully choose the partition key to avoid hot partitions. Usually primary key is a good choice for partition key.
Setup Entity Framework
First, install the required Nuget packages.
<ItemGroup>
    <PackageReference Include="Microsoft.EntityFrameworkCore.Cosmos" Version="8.0.6" />
</ItemGroup>
Next, let's create DbContext class.
public class AppDbContext : DbContext
{
    public AppDbContext(DbContextOptions<AppDbContext> options) : base(options)
    { }

    public DbSet<User> Users { get; init; }

    protected override void OnModelCreating(ModelBuilder modelBuilder)
    {
        modelBuilder.Entity<User>()
            .ToContainer("Users")
            .HasPartitionKey(u => u.Id)
            .HasNoDiscriminator();
    }
}
Here, I have overridden OnModelCreating method to configure the container for User entity. First, we are specifying the container name to be Users. Then, we are setting the partition key to be Id. Lastly, we are specifying that we do not want to use discriminator because we are storing only one type of entity in this container.
Now, let's register the AppDbContext, open Program.cs and add the following code. Call UseCosmos() method and pass the connection string and database name as arguments.
builder.Services.AddDbContext<AppDbContext>(options =>
{
    options.UseCosmos(builder.Configuration["ConnectionString"], "Playground");
});
You can get the connection string from Keys section of your Cosmos DB account.

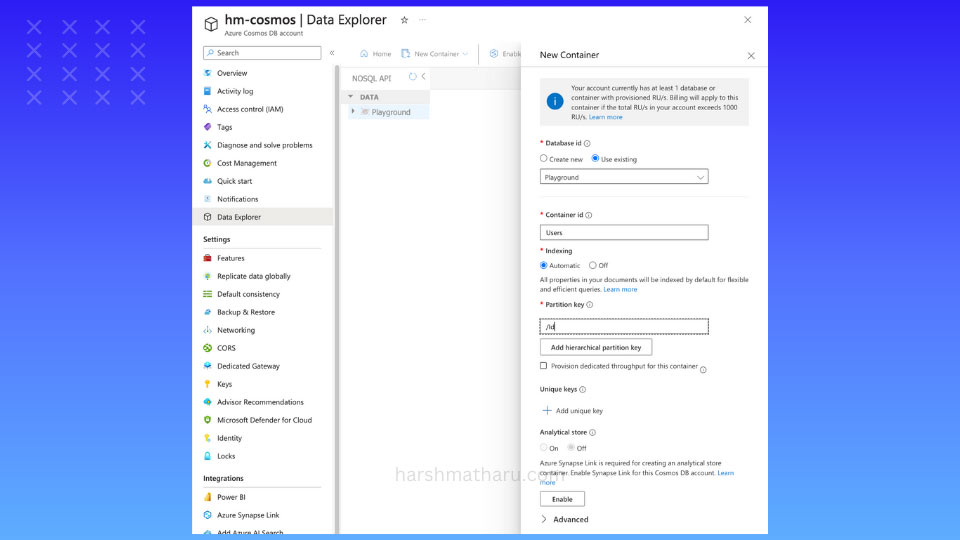
Create Container
- Open Azure Portal, navigate to your Cosmos DB account and click on Data Explorer.
- Select New Container from the options menu of our newly created database.
- Fill in the required details and click OK.
- Note the syntax for specifying the partition key. It starts with
/and in our case it is/Id.
Performing CRUD Operations
Now, we will look at performing CRUD operations on Cosmos DB using Entity Framework.
Creating a User
Now, let's add a new endpoint to add a new user. Update the Program.cs file as follows.
app.MapPost("/user", async (AppDbContext context, [FromBody]AddUserRequest request) =>
{
    var address = new Address(request.State, request.Country);
    var user = new User(Guid.NewGuid(), request.Name, request.Movies, address);

    context.Users.Add(user);
    await context.SaveChangesAsync();

    return Results.Ok();
});
And this is our request DTO.
class AddUserRequest
{
    public string Name { get; init; }

    public string[] Movies { get; init; }

    public string State { get; init; }

    public string Country { get; set; }
}
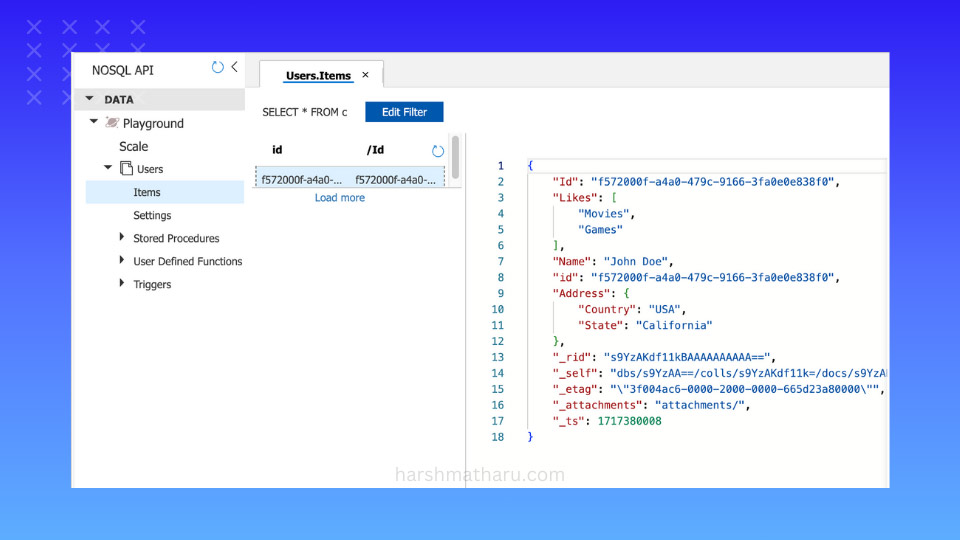
Run the application and hit the POST /user endpoint. You should see a new user added to the container.
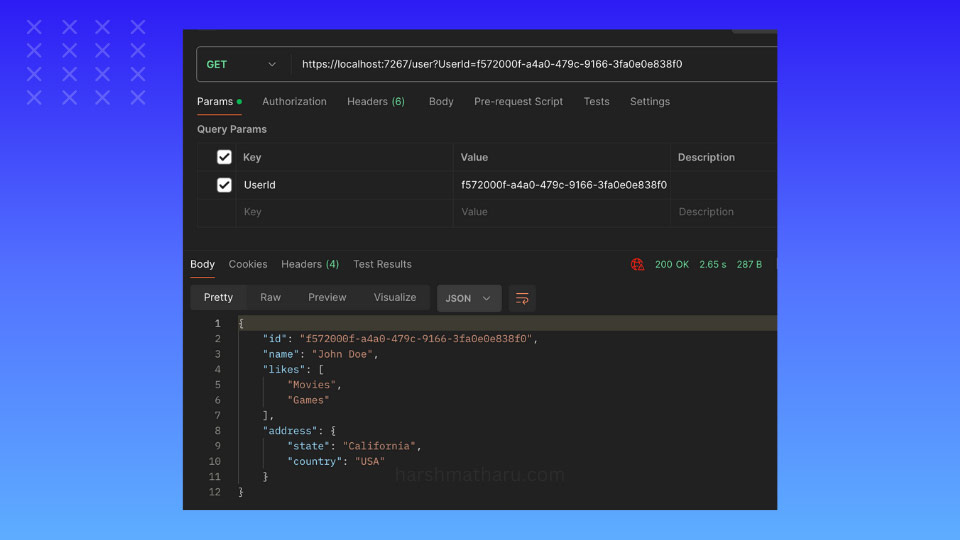
Reading a User
Add the following GET endpoint to get a single user by Id.
app.MapGet("/user", async (AppDbContext context, [FromQuery]Guid userId) =>
{
    var user = await context.Users
        .AsNoTracking()
        .WithPartitionKey(userId.ToString())
        .FirstOrDefaultAsync(u => u.Id == userId);

    return Results.Ok(user);
});
Note that we are using WithPartitionKey() method to specify the partition key value. You should design your application in such a way that you always have the partition key value available as this helps Cosmos DB to route the query to the correct partition. Otherwise, it will have to scan all the partitions which is highly inefficient.
Now, run the application and hit the GET /user?userId=<id> endpoint. You should see the user details.
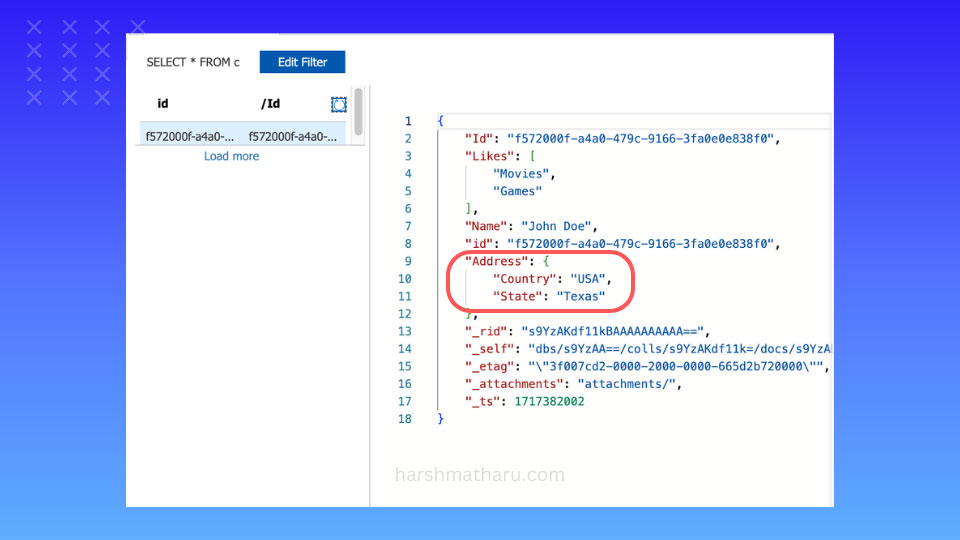
Updating a User
Add the following PATCH endpoint. This will change the user's address.
app.MapPatch("/user/change-address", async (AppDbContext context, [FromBody]ChangeAddressRequest request) =>
{
    var user = await context.Users
        .WithPartitionKey(request.UserId.ToString())
        .FirstOrDefaultAsync(u => u.Id == request.UserId);

    var newAddress = new Address(request.State, request.Country);

    user.Address = newAddress;
    await context.SaveChangesAsync();

    return Results.Ok(user);
});
The request DTO is as follows.
class ChangeAddressRequest
{
    public Guid UserId { get; init; }

    public string State { get; init; }

    public string Country { get; init; }
}
Hitting this endpoint will change the user's address.
Deleting a User
Now, let's delete the user. Add the following DELETE endpoint and then run the application and hit the endpoint. This will delete the user.
app.MapDelete("/user", async (AppDbContext context, [FromQuery]Guid userId) =>
{
    var user = await context.Users
        .WithPartitionKey(userId.ToString())
        .FirstOrDefaultAsync(u => u.Id == userId);

    context.Remove(user);
    await context.SaveChangesAsync();

    return Results.Ok();
});
Conclusion
In this tutorial, we learned how to get started with Azure Cosmos DB and Entity Framework in an ASP.NET application. We created a Cosmos DB account, set up Entity Framework, and performed CRUD operations on Cosmos DB using Entity Framework.