- Published on
Share local services across Internet with Dev Tunnels
Table of Contents
You've made some changes to your application and now you're eager to swiftly share it with your colleagues for instant feedback. You have a choice - either deploy your changes to a common development environment or utilize Dev Tunnels.
What are Dev Tunnels?
Dev Tunnels allow developers to share their locally running applications across the internet. This enables instant sharing of work in progress with colleagues for ad hoc testing and development purposes.
Setup Dev Tunnel
First, we need to download DevTunnel CLI. Execute the appropriate command based on your operating system to download the DevTunnel CLI.
Windows
Invoke-WebRequest -Uri https://aka.ms/TunnelsCliDownload/win-x64 -OutFile devtunnel.exe
This will download devtunnel.exe binary at your current path. Add this path to your Environment variables to execute devtunnel command from any location.
MacOS or Linux
curl -sL https://aka.ms/DevTunnelCliInstall | bash
Now, we need to login. While DevTunnel typically uses an Azure account by default, we can use our Github account for login by using the -g flag.
devtunnel user login -g
This will open up a browser based authentication flow.
For Windows Users
If you haven't set the path in your Environment variables, you'll need to execute the commands using ./devtunnel.
Sharing a WebApi with Dev Tunnel
I have a WebApi running at http://localhost:5001. Now, let's create a tunnel and host it.
Run the following command to host any locally running service.
devtunnel host -p 5001 --allow-anonymous
Use -p flag to specify port at which the service is running. By default, DevTunnels are secured, meaning the tunnel can only be accessed by the account that created it. To make it publicly accessible, we'll pass the --allow-anonymous flag.
If your application uses the HTTPS scheme then you need to pass the protocol flag.
devtunnel host -p 5001 --protocol https --allow-anonymous
Upon executing these commands, we will receive an output similar to the following:
Hosting port: 5001
Connect via browser: https://bskw8blx.inc1.devtunnels.ms:5001, https://bskw8blx-5001.inc1.devtunnels.ms
Inspect network activity: https://bskw8blx-5001-inspect.inc1.devtunnels.ms

Ready to accept connections for tunnel: bskw8blx
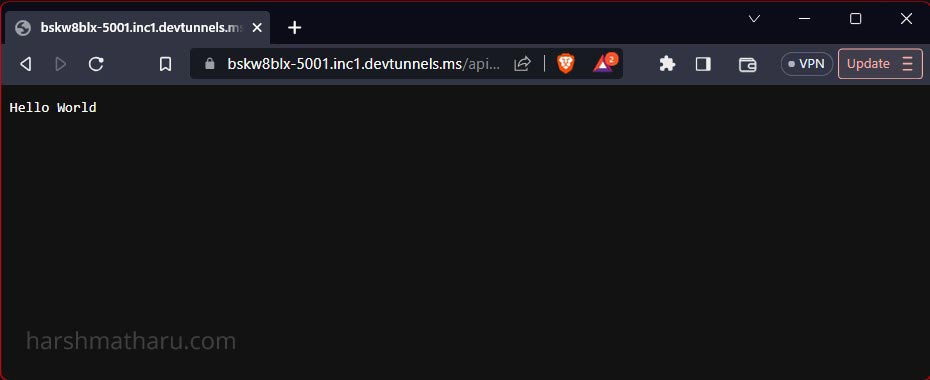
That's all! We can now access our application by visiting the provided URLs.
Using Dev Tunnel in Visual Studio
Make sure your Visual Studio's version is 17.6 or later and ASP.NET and web development workload is installed.
- In the debug dropdown menu, select Dev Tunnels > Create A Tunnel.
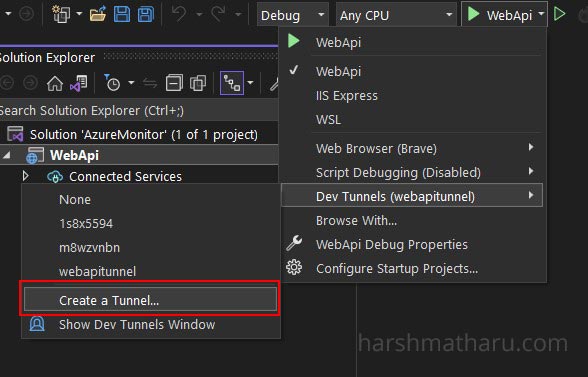
- The tunnel creation dialog opens and enter name and select type as Temporary. Make sure you are signed in and authentication type is set to Public.
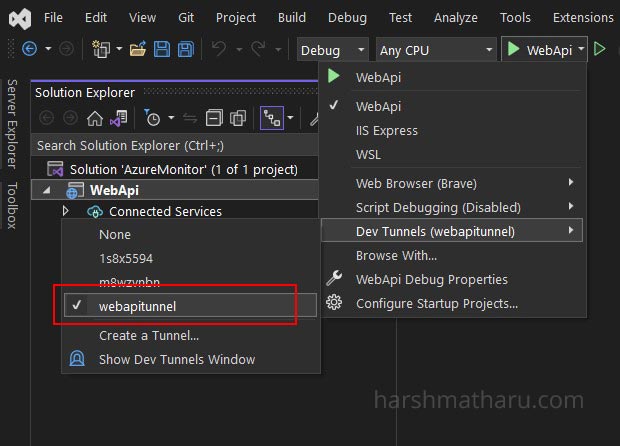
- Now, select the newly created Dev Tunnel in the debug dropdown menu and launch the program in debug mode.
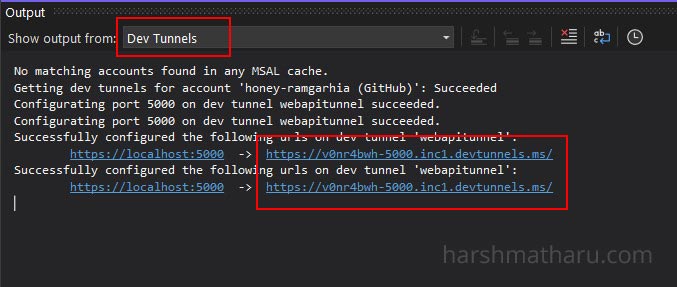
- The application is now hosted on Dev Tunnel, we can view the Dev Tunnel url in the output window. Select Dev Tunnels in the Show output from dropdown.