- Published on
Getting Started with Azure Table Storage in .NET
Table of Contents
Azure Table Storage is a NoSQL Key-Value datastore. To get an in-depth overview, please visit Introduction to Azure Table Storage.
In this post, we'll look into integrating Azure Table Storage in our .NET application, performing table management, basic CRUD operations and entity customization.
The source code used in these examples is available on my Github.
Table Management Operations
In this section we'll build a console application and perform table management operations on the Azure Table Storage.
Create a Storage account if you don't have one as we'll need it in the coming steps.
Setup
- Create a console application.
- Then, install Azure.Data.Tables NuGet package.
  <ItemGroup>
    <PackageReference Include="Azure.Data.Tables" Version="12.8.1" />
  </ItemGroup>
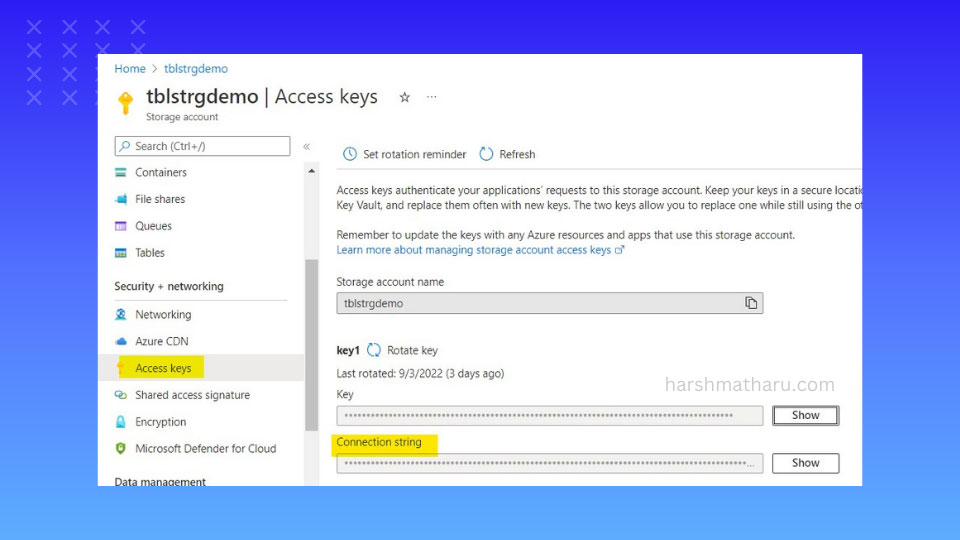
- Then, open Azure portal and go to the storage account, under Access keys you will find the connection string. Copy it.
Creating a table
To create a table we’ll need an instance of TableServiceClient. Create an instance by passing the connection string which we copied earlier.
using Azure.Data.Tables;

var tableServiceClient = new TableServiceClient("<connection string>");
await tableServiceClient.CreateTableAsync("Reports");
This will create a table named Reports.
To create a table only if it doesn't exist already, use the following method:
await tableServiceClient.CreateTableIfNotExistsAsync("Reports");
Deleting a table
To delete a table, call DeleteTableAsync() method and pass the table name as an argument.
await tableServiceClient.DeleteTableAsync("Reports");
CRUD Operations
In this section, we'll learn how to perform CRUD operations on Azure Table Storage.
Adding an entity
First, create a model, I have created a Product class. Now, to be able to add this model in the table, we have to implement ITableEntity interface.
public class Product : ITableEntity
{
    public Product(long id, string name, bool inStock, long categoryId,
        string categoryName, decimal price, DateTime createdAt)
    {
        Id = id;
        Name = name;
        InStock = inStock;
        CategoryId = categoryId;
        CategoryName = categoryName;
        Price = price;
        CreatedAt = createdAt;

        PartitionKey = categoryId.ToString();
        RowKey = id.ToString();
    }

    public long Id { get; set; }

    public string Name { get; set; }

    public bool InStock { get; set; }

    public long CategoryId { get; set; }

    public string CategoryName { get; set; }

    public decimal Price { get; set; }

    public DateTime CreatedAt { get; set; }

    // System Properties
    public string PartitionKey { get; set; }

    public string RowKey { get; set; }

    public DateTimeOffset? Timestamp { get; set; }

    public ETag ETag { get; set; }
}
Implementing ITableEntity adds four system properties to the model. We must set values for PartitionKey and RowKey, while values for the other two properties are set by the storage itself. If the role of PartitionKey and RowKey is unclear to you, please refer Role of PartitionKey and RowKey.
The Timestamp keeps track of when an entity was last updated, whereas Etag is a concurrency token.
Once ITableEntity is implemented, we need to instantiate TableClient and then we can use it's AddEntityAsync() method to add our model to the table.
await tableServiceClient.CreateTableIfNotExistsAsync("Products");
var tableClient = new TableClient("<connection string>", "Products");
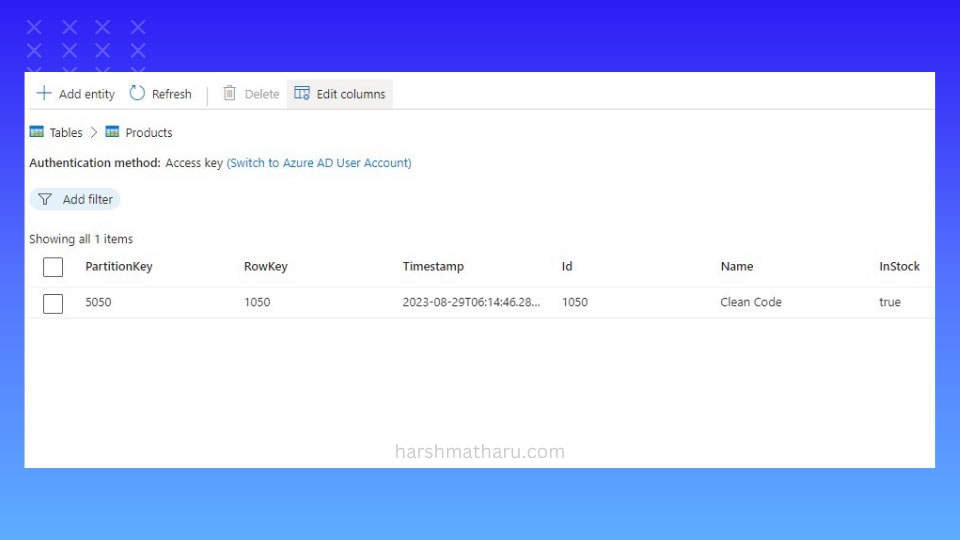
var product = new Product(1050, "Clean Code", true, 5050, "Books", 42.50m, DateTime.UtcNow);
await tableClient.AddEntityAsync(product);
Upserting an entity
Upsert is an operation which adds new entity into the table but if the specified entity already exists in the table then it swaps the old entity with the new one. Hence the name upsert (update + insert).
An Entity is matched based on PartitionKey and RowKey.
// This will update the existing product
var product1 = new Product(1050, "Clean Code", false, 5050, "Books", 49.99m, DateTime.UtcNow);
await tableClient.UpsertEntityAsync(product1);

// This will add a new product
var product2 = new Product(1060, "Refactoring", true, 5050, "Books", 40.99m, DateTime.UtcNow);
await tableClient.UpsertEntityAsync(product2);
Getting a single entity
All retrieval operations in Azure.Data.Tables require an entity to have a parameter-less constructor. Therefore, let's start by adding one to our Product class.
public class Product : ITableEntity
{
    public Product() { }
    ...
}
Now, we can use GetEntityAsync() method to get a single entity from the table. This method takes PartitionKey and RowKey as arguments.
var response = await tableClient.GetEntityAsync<Product>(5050.ToString(), 1050.ToString());
if (response.HasValue)
{
var productReturned = response.Value;
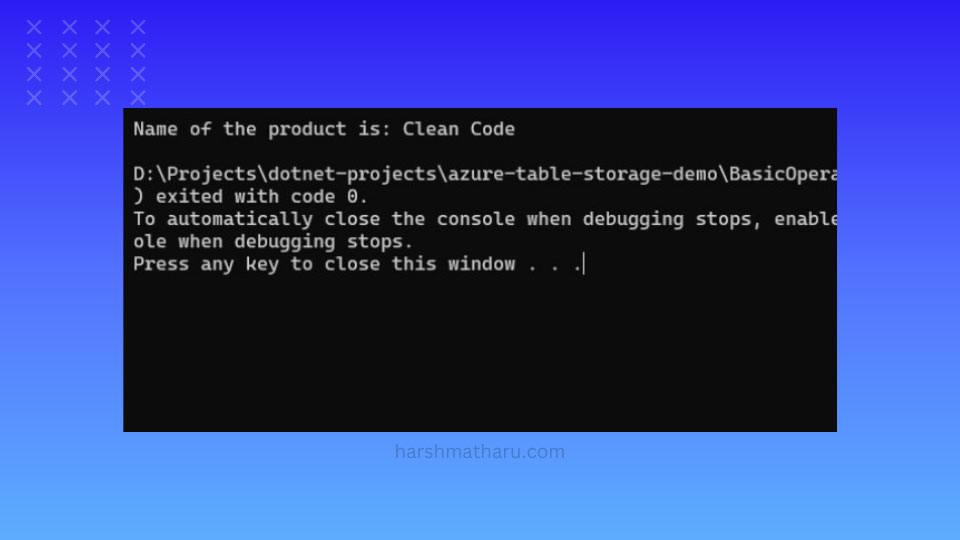
Console.WriteLine($"Name of the product is: {productReturned.Name}");
}
To get only specific columns, we have the option to pass a string array of column names. This way we only get back the columns we specify and rest of the properties in the model will be set to their default values.
var response = await tableClient.GetEntityAsync<Product>(5050.ToString(), 1050.ToString(), new string[] { "Id", "Name" });
Querying multiple entities
To retrieve multiple entities from the table we can use QueryAsync() method. It takes an expression as an argument that we can use to specify the condition.
The QueryAsync() method returns an AsyncPageable object, which is a type of IAsyncEnumerable that allows us to iterate over its values asynchronously. We can use an async foreach loop to iterate over the elements of the AsyncPageable.
var page = tableClient.QueryAsync<Product>(p => p.InStock == true && p.CategoryName == "Books");
await foreach (var product in page)
{
    Console.WriteLine($"Name of the product is: {product.Name}");
}
Updating an entity
To update an entity, use UpdateEntityAsync() method. It takes updated entity as the first argument and concurrency token as the second.
ETag acts as a concurrency token that enables optimistic concurrency control. Whenever an entity is updated, its Etag is also updated by the storage. So, when we send an entity update request to storage, first, its Etag value is matched with the current value stored in the table. If these values do not match then it means that another concurrent update has been performed on the entity just before this one. In that case storage returns an error and does not proceed with the current update.
var response = await tableClient.GetEntityAsync<Product>(5050.ToString(), 1050.ToString());
if (response.HasValue)
{
    var product = response.Value;
    product.Name = "Clean Code By Uncle Bob";
    await tableClient.UpdateEntityAsync(product, product.ETag);
}
If you don’t care about the concurrent updates and want to force the update then you can pass Etag.All as the second argument.
await tableClient.UpdateEntityAsync(product, ETag.All);
Deleting an entity
To delete an entity, use DeleteEntityAsync() method. It takes PartitionKey and RowKey as arguments.
await tableClient.DeleteEntityAsync(5050.ToString(), 1050.ToString());
Entity Configuration
We can use annotations to customize an entity.
Renaming a property
To rename a property, we can use [DataMember(Name = "new_name")] annotation.
public class Product : ITableEntity
{

    public long Id { get; set; }

    [DataMember(Name = "ProductName")]
    public string Name { get; set; }

    public bool InStock { get; set; }

    ...
}
Ignoring a property
To ignore a property, we can use [IgnoreDataMember] annotation.
public class Product : ITableEntity
{

    public long Id { get; set; }

    public string Name { get; set; }

    [IgnoreDataMember]
    public bool InStock { get; set; }

    ...
}
Conclusion
In conclusion, we explored Azure Table Storage, a NoSQL Key-Value data store, and its integration with the .NET application. We've covered essential aspects, including table management operations and fundamental CRUD (Create, Read, Update, Delete) operations. Also, we looked into renaming and ignoring the properties of an entity.
Overall, I hope this guide equips you with the knowledge to effectively utilize Azure Table Storage within your .NET applications, enabling robust data management and storage operations.
What's Next
- Learn How to execute Transactions in Azure Table Storage 📝.
- Learn Design Patterns for Query Optimization 🚀 when working with Azure Table Storage.