- Published on
Export Excel in ASP.NET WebAPI
Table of Contents
In this post we'll create a WebAPI for exporting data in the Excel format. To be more precise, we'll generate an Excel file and return it as the API response.
We will be using the ClosedXML library for generating Excel sheets. It is an open-source library built on top of the OpenXML SDK.
Office OpenXML is an XML based file format developed by Microsoft for representing spreadsheets, presentations and word processing documents.
Simple Excel Export Example
Install the latest version of the ClosedXML NuGet package.
<ItemGroup>
    <PackageReference Include="ClosedXML" Version="0.102.0" />
</ItemGroup>
Then, create an ExportController and paste the following code into it.
[ApiController]
[Route("[controller]")]
public class ExportController : ControllerBase
{
    [HttpPost("HelloWorld")]
    public IActionResult Export()
    {
        using var wb = new XLWorkbook();

        var sheet = wb.AddWorksheet("Sheet 1");

        // We can use row and column to select a cell.
        sheet.Cell(1, 1).Value = "Hello";
        // Or we can use cell's address.
        sheet.Cell("B1").Value = "World";

        return SendExcel(wb, "hello-world.xlsx");
    }

    private IActionResult SendExcel(XLWorkbook wb, string filename)
    {
        var stream = new MemoryStream();
        wb.SaveAs(stream);
        stream.Position = 0;

        return File(stream, "application/vnd.openxmlformats-officedocument.spreadsheetml.sheet", filename);
    }
}
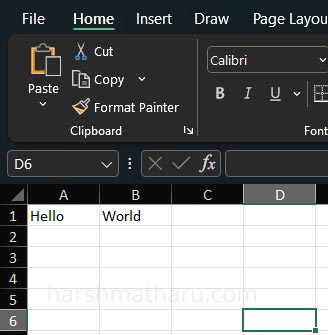
In the above code, we create an XL Workbook and add a single sheet to it. We manually input two values into cells, Hello and World. To return the file, we utilize the File() method in ASP.NET, which requires a stream, content type, and filename as input.
Now, open Postman to execute the API. Click on the Send and Download button.
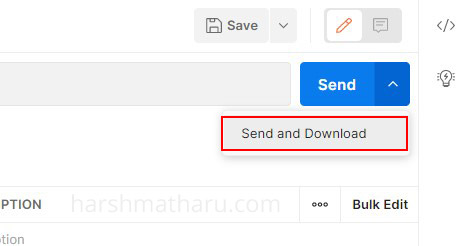
This will prompt the Save File Dialog. Once the file is saved, you can open it to view its contents.
With our fundamentals now in place, we can proceed to look into the following use cases.
- Exporting objects
- Adding a header row
- Styling a sheet
- Conditional Formatting
- Adding Hyperlinks
- Using Formulas
The source code used in these examples is available on my Github.
1 - Exporting objects
Create a class that will serve as a container for the data to be exported. I have created an Order class, and we will export a list of these Order objects.
public class Order
{
    public long Id { get; set; }

    public DateTime Date { get; set; }

    public bool HasShipped { get; set; }

    public decimal Amount { get; set; }
}
Now, add the following method to the ExportController class:
[HttpPost("ExportObject")]
public IActionResult ExportObject()
{
    using var wb = new XLWorkbook();

    // By default the sheet will be named as 'Sheet 1'.
    var sheet = wb.AddWorksheet();

    // Returns a list of random Order objects of specified count.
    var orders = randomOrderGenerator.Generate(5);

    // Specify a start location at which insertion will take place.
    sheet.Cell(1, 1).InsertData(orders);

    return SendExcel(wb, "orders.xlsx");
}
A couple of points to highlight: I've updated the ExportController and introduced the RandomOrderGenerator service, which is used to generate a list of random Order objects. Additionally, we use the InsertData() method to insert the data. This method accepts an IEnumerable, allowing us to pass any type of list of objects. Note that only the starting insertion location is specified as Cell(1, 1); the rest cells are automatically calculated by the method.
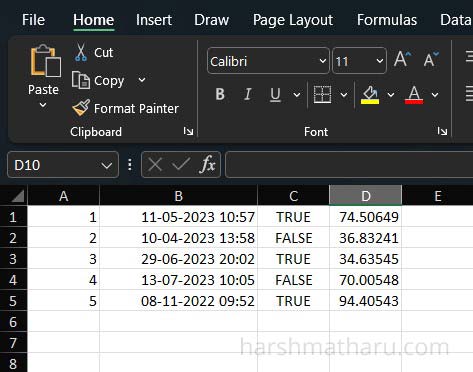
The resulting Excel file from executing this API looks as follows. Note, all the data types are also preserved.
2 - Adding a header row
To add a header row we will use the InsertTable() method. This method will insert our data as a table in the Excel sheet.
[HttpPost("ExportObjectWithHeader")]
public IActionResult ExportObjectWithHeader()
{
    using var wb = new XLWorkbook();
    var sheet = wb.AddWorksheet();

    var orders = randomOrderGenerator.Generate(5);

    sheet.Cell(1, 1).InsertTable(orders);

    return SendExcel(wb, "orders-with-header.xlsx");
}
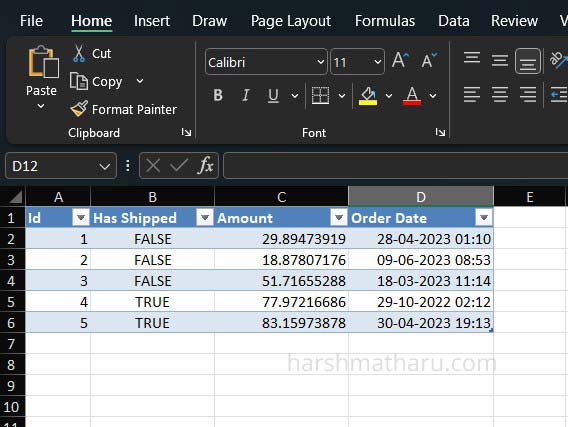
By default, the header row is populated using the property names. However, if we wish to modify the column names, we can achieve this using the XLColumn attribute. Additionally, we have the flexibility to specify the column order and exclude certain properties using the same attribute.
Properties with a specified order are consistently arranged before properties without a specified order.
public class Order
{
    [XLColumn(Order = 1)]
    public long Id { get; set; }

    [XLColumn(Header = "Order Date", Order = 4)]
    public DateTime Date { get; set; }

    [XLColumn(Header = "Has Shipped", Order = 2)]
    public bool HasShipped { get; set; }

    [XLColumn(Order = 3)]
    public decimal Amount { get; set; }

    [XLColumn(Ignore = true)]
    public string UserEmail { get; set; }
}
Below is the resulting Excel representation:
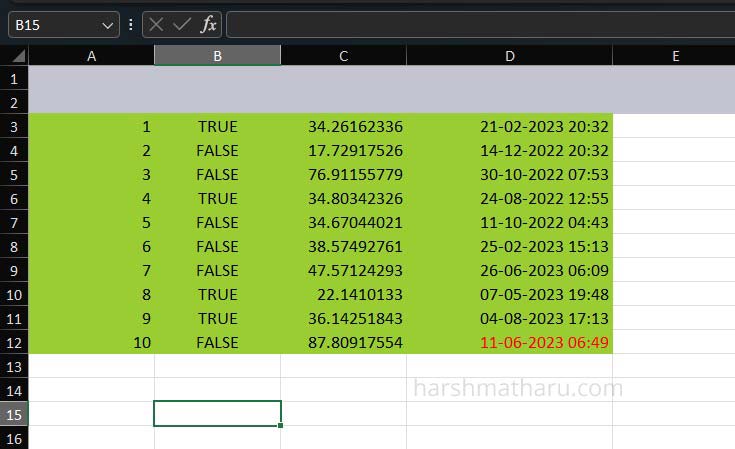
3 - Styling a sheet
When styling a sheet, we have the flexibility to apply styling across the entire sheet, individual rows and columns, specified ranges, or even single cells.
[HttpPost("StylingSheet")]
public IActionResult StylingSheet()
{
    using var wb = new XLWorkbook();
    var sheet = wb.AddWorksheet();

    // Make sure to insert data first and then style
    var orders = randomOrderGenerator.Generate(10);
    sheet.Cell(3, 1).InsertData(orders);

    // Style whole sheet
    sheet.Style.Font.SetFontSize(12);

    // Style rows and columns
    sheet.Columns().Width = 15;
    sheet.Column(4).Width = 25;
    sheet.Rows(1, 2).Style.Fill.BackgroundColor = XLColor.LavenderGray;

    // Style a range
    sheet.Range("A3:D12").Style.Fill.BackgroundColor = XLColor.YellowGreen;

    // Style individual Cell
    sheet.Cell("D12").Style.Font.FontColor = XLColor.Red;

    return SendExcel(wb, "styled-sheet.xlsx");
}
It's important to note that styles should be applied after inserting the data to avoid styles being overwritten when data is inserted.
4 - Conditional Formatting
Conditional formatting in Excel allows us to dynamically style cells based on certain conditions or criteria. With conditional formatting, we can visually highlight or emphasize specific data in the sheet, making it easier to analyze and interpret.
Here's how we can implement conditional formatting:
[HttpPost("ConditionalFormatting")]
public IActionResult ConditionalFormatting()
{
    using var wb = new XLWorkbook();
    var sheet = wb.AddWorksheet();

    var orders = randomOrderGenerator.Generate(10);
    sheet.Cell(1, 1).InsertData(orders);

    sheet.Range("C1:C10").AddConditionalFormat()
        .WhenEqualOrGreaterThan(50)
        .Fill.SetBackgroundColor(XLColor.Green);

    sheet.Range("A1:A10").AddConditionalFormat()
        .ColorScale()
        .LowestValue(XLColor.Red)
        .Midpoint(XLCFContentType.Percent, 50, XLColor.Yellow)
        .HighestValue(XLColor.Green);

    return SendExcel(wb, "conditional-formatting.xlsx");
}
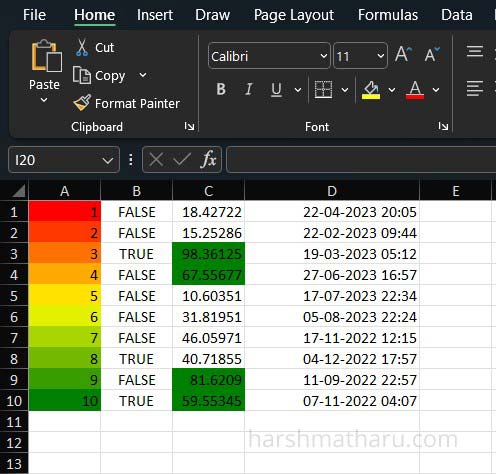
As you can notice in the code, we have used two conditional formattings.
The initial conditional formatting applies to the Amount column. When the amount is equal to or exceeds 50, the cell's background is set to a green color.
Subsequently, the second conditional formatting targets the Id column. Here, we used color scale to transition from red to yellow and then from yellow to green. The color interpolation is based on the values present in the column.
5 - Adding Hyperlinks
To add a hyperlink, we can use cell's SetHyperlink() method. While setting a hyperlink, also set a cell's value otherwise it will be empty.
sheet.Cell(1, 1).Value = "Go to Google";
sheet.Cell(1, 1).SetHyperlink(new XLHyperlink("https://www.google.com"));

sheet.Cell(2, 1).Value = "Go to B1 Cell";
sheet.Cell(1, 1).SetHyperlink(new XLHyperlink("B1"));
6 - Using Formulas
In Excel, formulas are expressions that perform calculations, evaluate conditions, or manipulate data based on cell references, values, functions, and operators. Formulas enable us to automate complex calculations within our sheets. They allow us to create dynamic relationships between cells and update values automatically when input data changes.
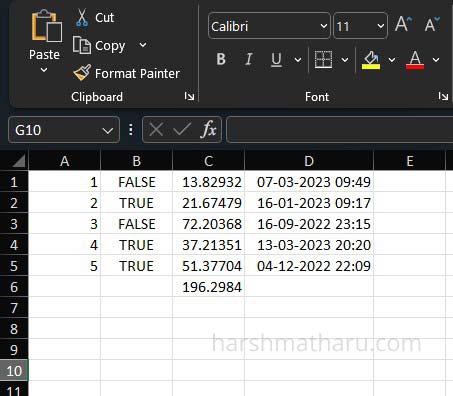
In the example below, I am using formula to get total amount of all the orders.
[HttpPost("UsingFormulas")]
public IActionResult UsingFormulas()
{
    using var wb = new XLWorkbook();
    var sheet = wb.AddWorksheet();

    var orders = randomOrderGenerator.Generate(5);
    sheet.Cell(1, 1).InsertData(orders);

    sheet.Cell("C6").FormulaA1 = "=SUM(C1:C5)";

    return SendExcel(wb, "formulas.xlsx");
}
Integration with Frontend
Another important consideration in Excel export is the integration with frontend. With the API prepared, the question arises: How can we download the Excel file from the frontend?
We can refer the below code snippet that, upon a button click, initiates the download of the Excel file. In this snippet, we are using the Axios HTTP library to download the Excel file.
The important thing to note here is that we have set the config.responseType to blob.
function App() {
    const download = async () => {
        const url = 'http://localhost:5000/Export/HelloWorld'
        const config = {
            responseType: 'blob',
            headers: {
                'Content-Type': 'application/json'
            }
        }
        const response = await axios.post(url, {}, config)

        const link = document.createElement('a');
        link.href = window.URL.createObjectURL(new Blob([response.data]));
        link.setAttribute('download', `${Date.now()}.xlsx`);
        document.body.appendChild(link);
        link.click();
    }

    return (
        <>
            <button onClick={download}>Download</button>
        </>
    )
}
FAQ
List of Excel Libraries for .NET and C#
Following is the list of top free Excel libraries.
- ClosedXML
- NPOI
Following is the list of top paid Excel libraries.
- EPPlus
- IronXL
- SyncFusion
- GrapeCity.Documents.Excel
How to create and write Excel file in C#?
Please refer the following code snippet to create and write an Excel file in C#. This will create an Excel file named hello-world.xlsx and save it on your machine.
public void WriteExcel()
{
    using var wb = new XLWorkbook();
    var sheet = wb.AddWorksheet();

    sheet.Cell(1, 1).Value = "Hello World!"

    wb.SaveAs("hello-world.xlsx");
}
Conclusion
In summary, this post equips us with the knowledge and tools to proficiently export Excel data using ASP.NET WebAPI.
Feel free to refer to the source code on my GitHub repository and experiment with the concepts discussed.